
Java Module - Pointer Detector Filter
This web application consists of a WebRTC video communication in mirror (loopback) with a pointer tracking filter element.
Note
Web browsers require using HTTPS to enable WebRTC, so the web server must use SSL and a certificate file. For instructions, check Configure a Java server to use HTTPS.
For convenience, this tutorial already provides dummy self-signed certificates (which will cause a security warning in the browser).
For the impatient: running this example
First of all, you should install Kurento Media Server to run this demo. Please
visit the installation guide for further
information. In addition, the built-in module kurento-module-pointerdetector
should be also installed:
sudo apt-get install kurento-module-pointerdetector
To launch the application, you need to clone the GitHub project where this demo is hosted, and then run the main class:
git clone https://github.com/Kurento/kurento.git
cd kurento/tutorials/java/pointerdetector/
git checkout main
mvn -U clean spring-boot:run
The web application starts on port 8443 in the localhost by default. Therefore, open the URL https://localhost:8443/ in a WebRTC compliant browser (Chrome, Firefox).
Note
These instructions work only if Kurento Media Server is up and running in the same machine
as the tutorial. However, it is possible to connect to a remote KMS in other machine, simply adding
the flag kms.url to the JVM executing the demo. As we’ll be using maven, you should execute
the following command
mvn -U clean spring-boot:run \
    -Dspring-boot.run.jvmArguments="-Dkms.url=ws://{KMS_HOST}:8888/kurento"
Understanding this example
This application uses computer vision and augmented reality techniques to detect a pointer in a WebRTC stream based on color tracking.
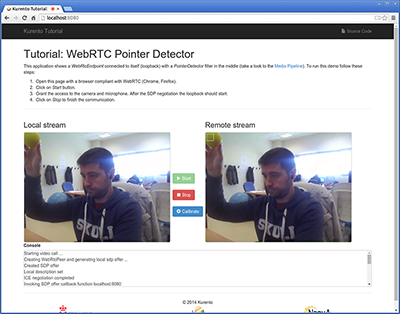
The interface of the application (an HTML web page) is composed by two HTML5 video tags: one for the video camera stream (the local client-side stream) and other for the mirror (the remote stream). The video camera stream is sent to Kurento Media Server, which processes and sends it back to the client as a remote stream. To implement this, we need to create a Media Pipeline composed by the following Media Element s:

WebRTC with PointerDetector filter in loopback Media Pipeline
The complete source code of this demo can be found in GitHub.
This example is a modified version of the Magic Mirror tutorial. In this case, this demo uses a PointerDetector instead of FaceOverlay filter.
In order to perform pointer detection, there must be a calibration stage, in which the color of the pointer is registered by the filter. To accomplish this step, the pointer should be placed in a square visible in the upper left corner of the video after going thorugh the filter, as follows:
Pointer calibration stage
When the desired color to track is filling that box, a calibration message is sent from the client to the server. This is done by clicking on the Calibrate blue button of the GUI.
After that, the color of the pointer is tracked in real time by Kurento Media
Server. PointerDetectorFilter can also define regions in the screen called
windows in which some actions are performed when the pointer is detected when
the pointer enters (WindowInEvent event) and exits (WindowOutEvent
event) the windows. This is implemented in the server-side logic as follows:
// Media Logic (Media Pipeline and Elements)
UserSession user = new UserSession();
MediaPipeline pipeline = kurento.createMediaPipeline();
user.setMediaPipeline(pipeline);
WebRtcEndpoint webRtcEndpoint = new WebRtcEndpoint.Builder(pipeline)
      .build();
user.setWebRtcEndpoint(webRtcEndpoint);
users.put(session.getId(), user);

webRtcEndpoint
      .addIceCandidateFoundListener(new EventListener<IceCandidateFoundEvent>() {

   @Override
   public void onEvent(IceCandidateFoundEvent event) {
      JsonObject response = new JsonObject();
      response.addProperty("id", "iceCandidate");
      response.add("candidate", JsonUtils
      .toJsonObject(event.getCandidate()));
      try {
         synchronized (session) {
      session.sendMessage(new TextMessage(
            response.toString()));
         }
      } catch (IOException e) {
         log.debug(e.getMessage());
      }
   }
      });

pointerDetectorFilter = new PointerDetectorFilter.Builder(pipeline,
      new WindowParam(5, 5, 30, 30)).build();

pointerDetectorFilter
      .addWindow(new PointerDetectorWindowMediaParam("window0",
      50, 50, 500, 150));

pointerDetectorFilter
      .addWindow(new PointerDetectorWindowMediaParam("window1",
      50, 50, 500, 250));

webRtcEndpoint.connect(pointerDetectorFilter);
pointerDetectorFilter.connect(webRtcEndpoint);

pointerDetectorFilter
      .addWindowInListener(new EventListener<WindowInEvent>() {
   @Override
   public void onEvent(WindowInEvent event) {
      JsonObject response = new JsonObject();
      response.addProperty("id", "windowIn");
      response.addProperty("roiId", event.getWindowId());
      try {
         session.sendMessage(new TextMessage(response
         .toString()));
      } catch (Throwable t) {
         sendError(session, t.getMessage());
      }
   }
      });

pointerDetectorFilter
      .addWindowOutListener(new EventListener<WindowOutEvent>() {

   @Override
   public void onEvent(WindowOutEvent event) {
      JsonObject response = new JsonObject();
      response.addProperty("id", "windowOut");
      response.addProperty("roiId", event.getWindowId());
      try {
         session.sendMessage(new TextMessage(response
         .toString()));
      } catch (Throwable t) {
         sendError(session, t.getMessage());
      }
   }
      });

// SDP negotiation (offer and answer)
String sdpOffer = jsonMessage.get("sdpOffer").getAsString();
String sdpAnswer = webRtcEndpoint.processOffer(sdpOffer);

// Sending response back to client
JsonObject response = new JsonObject();
response.addProperty("id", "startResponse");
response.addProperty("sdpAnswer", sdpAnswer);
synchronized (session) {
   session.sendMessage(new TextMessage(response.toString()));
}

webRtcEndpoint.gatherCandidates();
The following picture illustrates the pointer tracking in one of the defined windows:

Pointer tracking over a window
In order to send the calibration message from the client side, this function is used in the JavaScript side of this demo:
function calibrate() {
   console.log("Calibrate color");

   var message = {
         id : 'calibrate'
      }
   sendMessage(message);
}
When this message is received in the application server side, this code is execute to carry out the calibration:
private void calibrate(WebSocketSession session, JsonObject jsonMessage) {
   if (pointerDetectorFilter != null) {
      pointerDetectorFilter.trackColorFromCalibrationRegion();
   }
}
Dependencies
This Java Spring application is implemented using Maven. The relevant part of the pom.xml is where Kurento dependencies are declared. As the following snippet shows, we need two dependencies: the Kurento Client Java dependency (kurento-client) and the JavaScript Kurento utility library (kurento-utils) for the client-side. Other client libraries are managed with webjars:
<dependencies>
   <dependency>
      <groupId>org.kurento</groupId>
      <artifactId>kurento-client</artifactId>
   </dependency>
   <dependency>
      <groupId>org.kurento</groupId>
      <artifactId>kurento-utils-js</artifactId>
   </dependency>
   <dependency>
      <groupId>org.webjars</groupId>
      <artifactId>webjars-locator</artifactId>
   </dependency>
   <dependency>
      <groupId>org.webjars.bower</groupId>
      <artifactId>bootstrap</artifactId>
   </dependency>
   <dependency>
      <groupId>org.webjars.bower</groupId>
      <artifactId>demo-console</artifactId>
   </dependency>
   <dependency>
      <groupId>org.webjars.bower</groupId>
      <artifactId>adapter.js</artifactId>
   </dependency>
   <dependency>
      <groupId>org.webjars.bower</groupId>
      <artifactId>jquery</artifactId>
   </dependency>
   <dependency>
      <groupId>org.webjars.bower</groupId>
      <artifactId>ekko-lightbox</artifactId>
   </dependency>
</dependencies>
Note
You can find the latest version of Kurento Java Client at Maven Central.